


Choosing kayaking accessories is easier when you separate safety essentials from comfort gear and optional extras. A short, sheltered paddle has different demands from a long route or changing weather, but every outing benefits from a plan for flotation, communication, water, and the conditions you may encounter. Build your kayaking accessories list around the trip you intend to take, not a generic packing checklist.
Shop a whistle for your water-activity kit
Which kayaking accessories belong in the essential kit?
Start with equipment that helps you stay afloat, communicate, and manage basic needs. A list of kayak trip essentials from The Mountaineers includes water, food, and a first-aid kit, among other gear. Treat any checklist as a starting point: route, duration, weather, group experience, and local rules affect what you should bring.
For most recreational paddlers, the core kit includes a properly fitted personal flotation device (PFD), a suitable paddle, a way to signal for help, drinking water, and a phone or other communication device protected from water. Confirm that safety equipment is appropriate for your craft and outing, and learn how to use it before launch. A whistle can help attract attention; a Fox 40 whistle is one option in Swim2000’s water-sports-adjacent catalog, but a product listing is not a substitute for checking suitability, attachment, or local requirements.
Carry a compact first-aid kit that is appropriate to the group and trip. Keep medications you may need accessible and protected. Pack drinking water in a secure container, and bring more than you expect to use if the route, heat, or access to shore calls for it. For a longer outing, food that is easy to eat and store can be more useful than elaborate snacks.
Think through access, fit, and reach before leaving shore. A PFD should fit the person who will wear it, stay secured as directed, and allow the paddler to move through a full stroke without riding up or restricting movement. A signaling device should be attached where it can be reached without rummaging through a bag. Put a phone in a protective case or dry storage, but do not let the storage make it inaccessible if the group needs to contact help. Check the device’s charge and decide who is carrying it; relying on one person’s phone without a backup plan can leave the whole group unprepared if that person becomes separated.
Match basic supplies to the route rather than assuming that a nearby shoreline solves every problem. A familiar loop on a sheltered pond may allow easy returns to the launch, while a longer crossing or a route with limited access points calls for more careful planning. Consider how much water and food the group needs, how long a delay could last, and whether anyone has personal medication or other specific needs. Keep essential items arranged so another member of the group can find them if needed.
Key takeaway: Set aside flotation, signaling, communication, water, and first aid before adding convenience items. The basics should match the actual route and conditions, not just the amount of storage in your kayak.
How do you choose kayaking accessories for sun, splash, and comfort?
Comfort gear should help you manage exposure and stay organized without getting in the way of paddling. Choose clothing for the forecast and water conditions, not only the air temperature. Sun sleeves, a brimmed hat, and sunglasses with a secure retainer may be useful in bright conditions. A long-sleeve rashguard can add coverage, but do not assume a particular garment provides a rated level of sun protection unless its product details say so.
Swim2000 carries aquatic apparel such as the TYR Belize long-sleeve rashguard and a unisex Speedo sun suit. These are apparel options to review for fit and coverage; check each listing’s materials, sizing, and intended use before deciding whether it suits your paddle. A comfortable garment should allow full shoulder movement and should not bunch under straps or restrict your stroke.
Footwear is another personal choice. Some launch areas are sandy and easy to walk across; others have rough or slippery surfaces. Check the access point and pick footwear suited to that ground. The Speedo water-repellent slipper is an aquatic-footwear product to consider for shore or changing-area use, but verify its fit and intended surfaces rather than assuming it is a kayak shoe or offers grip in every condition.
After a paddle, a towel and a dry change of clothes make the transition home more comfortable. A TYR Hyper-Dry sport towel is one item to review for your post-paddle kit. Store it separately from wet gear so it stays useful when you need it. Never rely on a towel or spare clothing in place of weather-appropriate layers during the outing.
Plan clothing in layers that work together. The layer next to your skin should feel comfortable during repeated arm movement, while an outer layer should be easy to put on or remove when conditions change. Avoid loose drawstrings, dangling accessories, or a garment that catches on buckles or other equipment. Try your intended outfit at home: sit as you would in the kayak, rotate your shoulders, reach forward, and mimic several paddle strokes. That quick check can reveal a tight seam, slipping hat, or strap conflict before you are on the water.
For a sunny route, consider how long you will be exposed and where shade or shelter might be available. A hat and sunglasses may improve comfort, but they should stay secure when you turn your head or look down. For a cool or windy day, think about how wet clothing and air movement may affect comfort after a splash. Use the forecast and local guidance to make decisions; do not treat a swim shirt or casual layer as thermal protection unless its maker identifies it for that purpose.
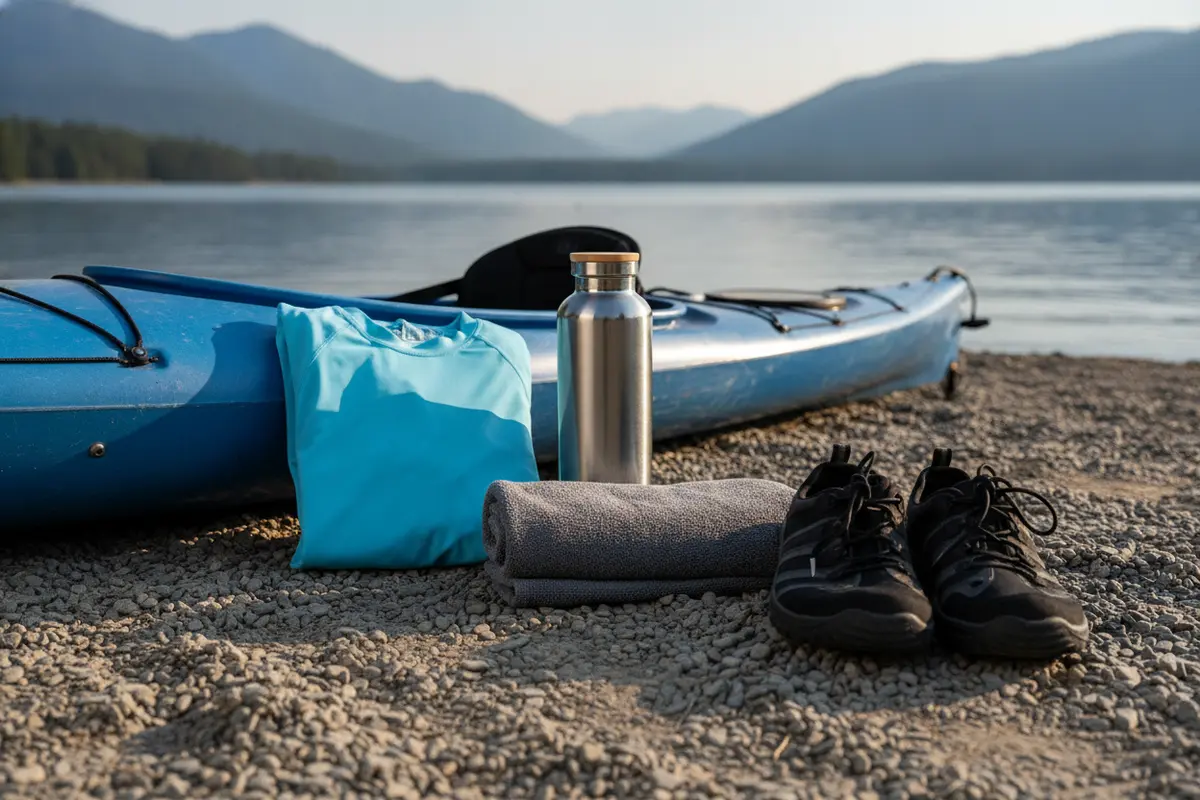
Key takeaway: Select clothing and comfort items for the outing’s exposure, movement, launch surface, and post-paddle needs. Product names alone do not establish that an item is made for kayaking, so check fit and the manufacturer’s stated use.
What should you pack for storage, hydration, and changing conditions?
Keep items you need during the paddle reachable, and protect anything that must stay dry. A waterproof dry bag designed for the activity is a better choice for valuables than an ordinary backpack. Pack the bag so the contents cannot shift heavily to one side, and secure it to the craft using a method appropriate to the kayak. Do not assume a regular gear bag, backpack, or product described as water-repellent will keep contents dry if it gets splashed or submerged.
Separate items by purpose: safety gear should be accessible, snacks and water should be easy to reach, and spare clothing can go in protected storage. A checklist helps avoid leaving a phone, medication, or keys loose at the launch. Test your packing arrangement on a short outing before depending on it for a longer route.
For transporting equipment to the launch, a carry bag can help gather items on land. Swim2000 lists a TYR Victory Backpack for swim-team gear; it is a land-transport option to evaluate, not a waterproof kayak deck bag. Similarly, the Water Gear Noodle Bag is described as large enough to fit several pool noodles, so consider it only for bulky transport where its dimensions and construction meet your needs. Neither replaces secure, activity-appropriate dry storage.
When choosing storage, check more than the word “waterproof” in a product description. Read how the closure works, what the maker says about immersion or spray, and whether the bag has attachment points suited to your kayak. A seal that is not fully closed or a bag that can slide loose may defeat the purpose of protective storage. Keep items that must remain dry—such as a change of clothes, keys, and electronics—in an inner waterproof pouch as an additional layer where appropriate. Test the closure according to its instructions before placing valuables inside.
Make a simple packing map. For example, keep the whistle clipped to the PFD, put water where it can be reached without leaning far, and store the phone in a protected but accessible pocket. Place heavier items low and centered when your craft’s storage layout allows, then secure them so they cannot roll or shift. Do not block access to equipment you may need quickly. If the kayak has limited storage, carry only gear that serves a defined purpose and avoid loose items that could interfere with movement.
Weather can change the gear you need. Check the forecast and water conditions shortly before departure, and think through how you would respond to wind, rain, falling temperatures, or a delayed return. On longer trips, add food and water appropriate to the duration and have a plan for communicating your location and expected return time. If conditions exceed your group’s experience, change the plan or postpone the outing.
A practical way to build the kit is to pack for three time windows: what you need immediately, what you might need during the route, and what belongs after landing. Immediate items include worn or quickly reachable safety equipment. Route items may include water, snacks, and a protected phone. The post-paddle bag can hold dry clothes and a towel. This division clarifies what must stay accessible and reduces the temptation to bury important equipment under extras.
How can you compare essential and optional kayaking accessories?
Use this comparison to plan a kit rather than buying every item at once. The “priority” column is a practical planning guide, not a substitute for local regulations, instructor advice, or the conditions of a specific route.
| Gear | Priority | What to check | Planning note |
|---|---|---|---|
| Properly fitted PFD | Essential | Fit, condition, and suitability for the paddler and craft | Wear it as directed; confirm applicable local rules. |
| Paddle and signaling device | Essential | Correct paddle for the craft; signal device is accessible | Practice using and reaching for your signal before launch. |
| Water and first-aid kit | Essential planning items | Amount, access, trip length, and group needs | Protect supplies from spray and include personal necessities. |
| Waterproof storage | Strongly useful | Closure, capacity, and secure attachment | Keep valuables and spare layers protected from water. |
| Sun-covering clothing and hat | Condition-dependent | Coverage, comfort, range of motion, and stated sun protection | Choose for exposure and forecast; avoid unverified protection claims. |
| Water shoes or shore footwear | Optional, access-dependent | Fit and suitability for the launch surface | Do not assume casual aquatic footwear is designed for paddling. |
| Towel and spare clothes | Useful after the paddle | Packability and protected storage | Keep dry clothing separate from wet gear. |
| Extra comfort items | Optional | Whether the item solves a real need without adding clutter | Test on an easy outing before carrying it on a longer trip. |
Comfort additions depend on the paddler and route. Some people appreciate a hat, a spare layer, a small snack, or a towel; others prefer a lighter load. Add one item at a time and note whether it was useful. That simple review keeps the kit specific to your routine rather than turning it into a pile of gear.
Use a small “must have, should have, nice to have” check when comparing options. The must-have group covers safety and the requirements of the planned trip. The should-have group might include protected storage, an additional layer, or supplies tailored to the route. Nice-to-have items are comfort extras that do not solve an urgent need. If the kit becomes crowded, reconsider the nice-to-have items first; do not remove safety equipment to make room for convenience gear.
Compare products by the job they need to do, not by how many features they list. For storage, useful questions include whether the closure is understandable, whether its capacity suits the actual items, and whether it can be attached securely. For clothing, compare fit, coverage, and freedom of movement. For footwear, consider the walk from parking to launch and whether the ground is rocky, sandy, or slippery. Set a budget that reflects your priorities, then select the simplest suitable gear rather than buying duplicates that perform the same role.
How should swimmers and paddle-sports shoppers adapt their swim gear?
Swimmers already own useful aquatic apparel and post-activity items, but pool gear does not automatically become kayak safety equipment. Swimwear can work as a base layer when it fits comfortably beneath any required outer clothing. A rashguard may offer coverage, and a towel may be useful after landing. None of these replaces a PFD, a paddle, secure storage, or a signaling and communication plan.
Before using a piece of swim gear for paddling, ask three questions: Is it comfortable through repeated shoulder movement? Will it remain secure if wet? Does the maker describe it for the use you have in mind? If the answer is unclear, choose equipment purpose-built for the activity or ask a knowledgeable outfitter. For trips that include swimming, currents, or open water, do not treat casual swim experience as proof of kayak rescue readiness.
Swim2000 is a trusted swim shop specializing in competitive swimwear and gear since 1994. Its catalog includes items for aquatic activities, but shoppers should check each product’s intended use and specifications before adapting it to a paddle-sports outing. For eligible orders, the shop lists free standard shipping on qualifying purchases of $50 or more within the continental United States; review current shipping terms before ordering.
For a simple land-side kit, compare the Arena hoodie or other dry clothing with your expected conditions, and bring a towel for after the paddle. These are apparel and comfort considerations, not substitutes for kayak-specific gear. If your outing involves a child, a new paddler, or a group, check fit and readiness individually rather than assuming one shared size or kit works for everyone.
Pool routines can help you identify what you already own, but make a deliberate conversion list before packing. A swim bag may hold apparel, a cap, and a towel; a kayak kit still needs activity-appropriate flotation, signaling, communication, and secure storage. Keep those categories distinct when shopping so that familiar swim equipment does not create a false sense that the whole trip is covered. For a mixed group of swimmers and paddlers, review each person’s items rather than assuming that the strongest swimmer automatically has the right equipment or preparation for the waterway.
Children and new paddlers need individual attention. Check that each person’s wearable gear fits them and that they can follow the group’s basic instructions. Choose simple clothing and supplies that will not create distractions, and keep personal items such as needed medication with the person who can access them. If someone is unsure about equipment or conditions, choose a route and plan that reflect that uncertainty instead of relying on confidence alone.
What should you check before heading to the launch?
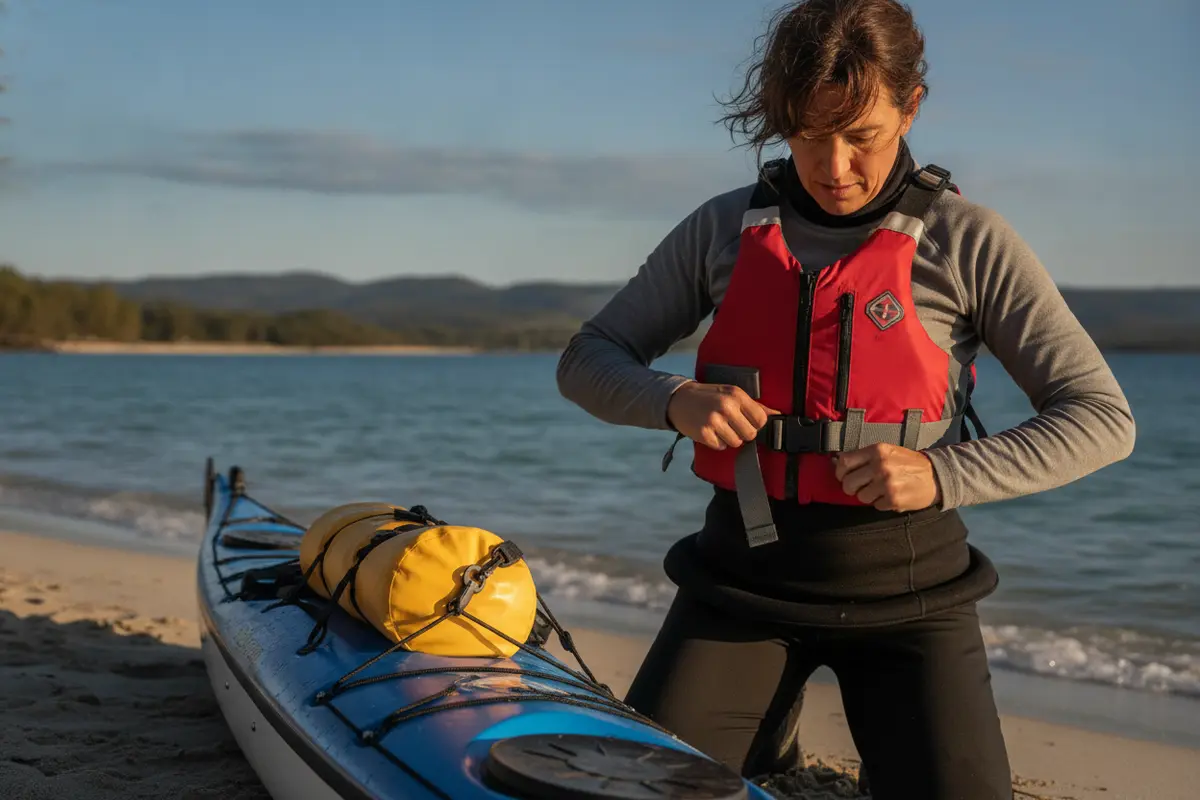
A five-minute check can catch missing items while you are still on shore. Use this sequence and adapt it to the outing:
- Confirm the plan. Match the route and duration to your group’s experience and check current weather and water conditions.
- Check safety equipment. Inspect the PFD and make sure it fits, is worn as directed, and is appropriate for the trip. Keep your signaling device within reach.
- Protect essentials. Secure communication devices and spare clothing in activity-appropriate waterproof storage. Keep water, food, and first aid accessible.
- Dress for the conditions. Choose clothing for water and weather exposure, with enough freedom of movement for paddling. Bring a protected spare layer when appropriate.
- Tell someone the plan. Share your route and expected return time with a person who is not on the trip, and update them if the plan changes.
- Reconsider if needed. If gear is missing, conditions have worsened, or anyone is uncomfortable, adjust the route or postpone.
A checklist cannot remove every risk, but it can prevent avoidable oversights. Build it around the trip you are actually taking, then revise it after you learn what you used and what you missed.
Do a quick equipment check before loading the car as well as at the launch. Look over straps, closures, and buckles, and make sure the paddle and essential items are accounted for. If you have new gear, practice adjusting or opening it at home or in a controlled setting, rather than learning how it works when you need it on the water. Follow the maker’s instructions for care and storage, and replace damaged items instead of assuming a worn closure or strap will hold.
Think about how the group will stay together and communicate. Agree on a simple meeting point or regrouping plan before launching, especially if paddlers have different experience levels. Keep the route manageable, and make sure everyone knows what to do if someone wants to turn back. A few minutes spent setting expectations can reduce confusion and help the group make a calm decision when conditions or energy change.
After each outing, take a few minutes to review what happened. Note whether you used the extra layer, whether the water was easy to reach, and whether any item shifted or was difficult to find. Replace used first-aid supplies, recharge devices, dry wet gear fully, and return essentials to the same place in the kit. A brief reset makes the next departure easier and helps you remove items that added weight without serving a purpose.
For a first outing with a new arrangement, keep the plan simple. Pack the same core essentials, then try one new accessory at a time so you can tell what made a difference. If a bag is awkward to reach or clothing interferes with movement, change the setup on shore or after the paddle. Do not wait until a longer trip to discover that an item’s fit, closure, or location does not work for you.
Explore aquatic apparel for your next day on the water
Frequently asked questions about kayaking accessories
What are the most important kayaking accessories for a beginner?
Prioritize a properly fitted PFD, a suitable paddle, a signaling device, drinking water, communication, and a basic first-aid kit. Check the route, conditions, and local requirements, and get instruction or guidance appropriate to your experience before going farther than you can manage.
Do swimmers need different accessories for kayaking?
Swimwear, a rashguard, and a towel may be useful for comfort, but they do not replace kayak-specific safety equipment. A swimmer should still plan for flotation, signaling, communication, hydration, and protected storage, and should not assume pool experience prepares them for open-water conditions.
Can I use a regular backpack as a kayak dry bag?
No. An ordinary backpack is not necessarily waterproof or designed to stay secure on a kayak. Use storage made for the activity, check its closure and attachment, and keep essential items protected even if the bag is exposed to spray.
What should I bring for a short paddle?
Even a short outing calls for appropriate flotation, a paddle, a way to signal, water, communication, and planning for the weather and route. Add first aid and other items based on the group’s needs and conditions; a shorter distance does not make changing conditions irrelevant.
Which kayaking accessories are optional?
Items such as extra comfort clothing, a towel, a snack, or shore footwear depend on the trip and the paddler. Add optional gear only when it solves a specific need, and never let comfort accessories displace essential safety equipment.
Plan your kayaking accessories around safety first, then add the clothing, storage, and comfort items that fit your route and conditions. Review product details carefully, and choose purpose-built kayak equipment whenever a swim product’s intended use is uncertain.


